Direct Publishing of Projects to Cyclone ENTERPRISE
Directly publish to Cyclone ENTERPRISE
In addition to importing LGS and JSA files, it is also possible to directly publish to Cyclone ENTERPRISE from authoring products.
Compatible Authoring Products
The following authoring products are compatible with Cyclone ENTERPRISE:
-
Cyclone REGISTER 360 version 2021.0.0 or newer
-
Cyclone REGISTER 360 (BLK Edition) version 2021.0.0 or newer
-
Cyclone CORE version 2021.0.0 or newer
Note: Additional Leica Geosystems, Hexagon, and 3rd Party Partner products will continue to be added to this list as those products receive updates.
Required User Permissions
Only the following Roles may directly publish projects:
-
Supervisors
-
Administrators
-
Group Admins
Instructions for Direct Publishing of Projects
Publishing from Cyclone REGISTER 360 and Cyclone REGISTER 360 (BLK Edition)
To directly publish from Cyclone REGISTER 360 to Cyclone ENTERPRISE:
-
Finalize the registration in Cyclone REGISTER 360.
-
Click on "Publish Options" Tab and choose Cyclone ENTERPRISE.

-
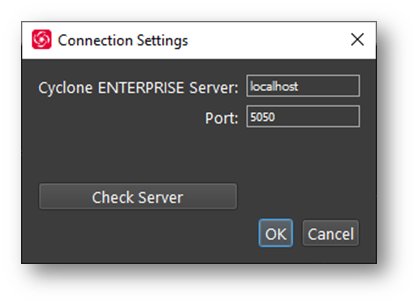
Upon selection, if the Cyclone ENTERPRISE server is not set yet, the “Connection Settings” dialog will pop up.
-
Enter the Cyclone ENTERPRISE Server address port.
-
For example, "localhost" and "5050" for the local Cyclone ENTERPRISE instance.
-
Click “Check Server”. If the provided address and port is correct and the server is functioning properly the test will pass
-
Click OK to continue
-
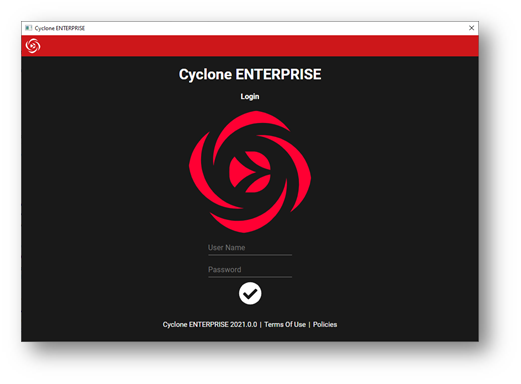
In order to publish, you need to login with a user that has publishing permission.
-
See Section User Role Definitions for details.
-
Enter the user credentials and continue.
-
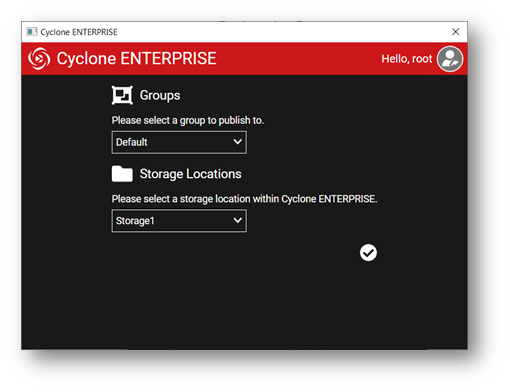
Choose the Group and Storage location for publishing.
-
You may need to login to the Cyclone ENTERPRISE from the Internet browser and set the storage location if no Storage location is set.
-
Refer to Section Storage Locations in for details.
-
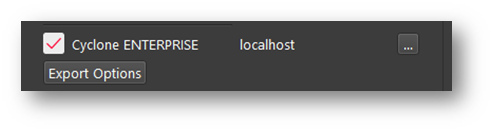
If you wish to login as a different user, you need to logout first by clicking “Logout” and login with the new user.

-
If the server is already set and you wish to publish to a different Cyclone ENTERPRISE Server, click on the “…”
-
From “Export Options”, you may change project component that are being published to Cyclone ENTERPRISE.
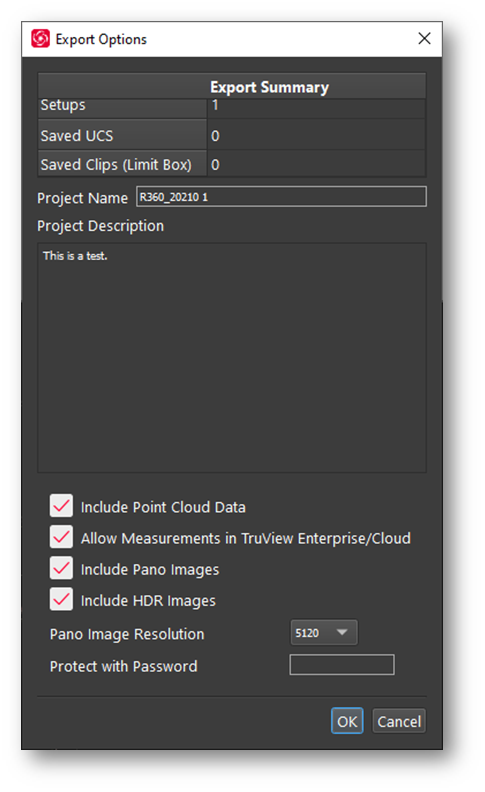
- When all settings are specified, click Publish to start publishing.
-
If there is another project with the same name, you will be asked to change the Project Name.
-
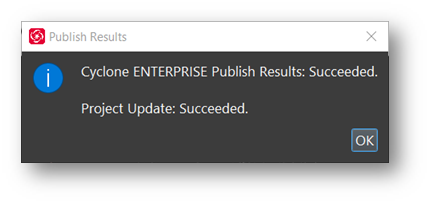
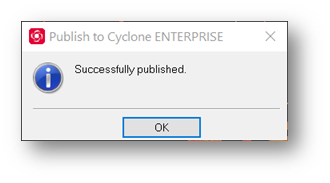
When the project is successfully published you will see the Publishing Results dialog
Note: See the Help document of the product for more details.
Publishing from Cyclone CORE
To directly publish from Cyclone CORE to Cyclone ENTERPRISE:
- Open the ModelSpace View that you wish to Publish
- Set the following viewing setting
- Top View
- Orthographic View
- Zoom to the extent of the data, choose View All to extend to all
- This view will be the background image for the SiteMap
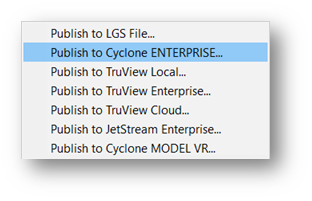
- Choose “Publish into Cyclone ENTERPRISE…” from File | Publish menu
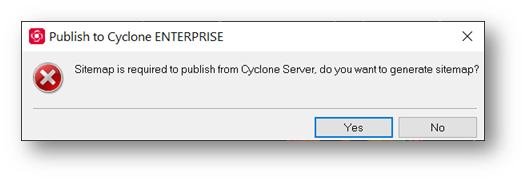
- A dialog will be shown that asks you to confirm that you wish to generate a SiteMap based on the current view
- After accepting the SiteMap, the following dialog will be shown that you can set the Server and Publish settings.
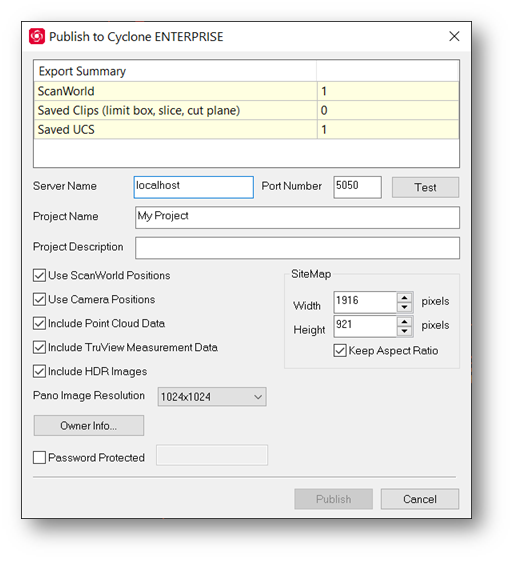
- Enter the Cyclone ENTERPRISE Server address and port in Server Name and Port Number, respectively.
- For example, “localhost" and "5050" for the local Cyclone ENTERPRISE instance.
- Click “Test”. If the provided address and port is correct and the server is functioning properly the test will pass
- If you wish to login as a different user, you need to logout first by clicking “Logout” and login with the new user.
- From “Export Options”, you may change project component that are being published to Cyclone ENTERPRISE.
Note: Please refer to Publish to LGS section in Cyclone CORE help for details.
- When all settings are specified, click Publish to start publishing.
- To publish, you need to login with a user that has publishing permission.
See Section User Role Definitions for details.
Enter the user credentials and continue.

- Next, you need to choose the Group and Storage location for publishing.
- You may need to login to the Cyclone ENTERPRISE from the Internet browser and set the storage location if no Storage location is set.
- Refer to Section Storage Locations in for details.
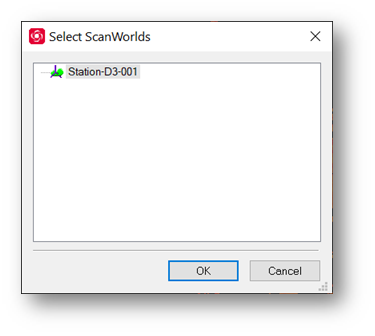
- Cyclone will a ask you to choose the ScanWorlds to be published
- Select the ScanWorlds and click “OK”.
- If there is another project with the same name, you will be asked to change the Project Name.
- When the project is successfully published you will see the Publishing Results dialog
Note: See the Help document of the product for more details.