Installing & Licensing on Amazon Web Services (AWS)
Introduction
This section provides instructions for deploying Cyclone ENTERPRISE on the cloud when running the Cyclone ENTERPRISE server on Amazon Web Services (AWS).
Note: This guide assumes you have experience with the Windows command-line interface.
Note: Prior experience with AWS is not required but is helpful.
Note: Customers with an existing AWS account can skip section Create your AWS account and proceed to section Obtain AWS API Tokens. As a best security practice, we recommend that you create a new IAM user specifically for Cyclone Enterprise. Instructions for this task are in the section.
- Open https://aws.amazon.com.
- Select Create an AWS Account at the top right corner of the page.
- Enter your account information, and then choose Continue. Ensure that your account information is accurate.
- Select Professional.
- Enter your company information.
- Accept the AWS Customer Agreement.
- Choose Create Account and Continue.
- Enter your credit card information. Your AWS usage expenses will be charged on this card. Click Verify and Add.
- Choose SMS or Voice call and your mobile phone number to confirm your identity.
- Select Basic Plan for the support plan.
Account activation may take up to an hour. You will be notified by email when your account is ready.
For more information on the AWS signup process, see: https://aws.amazon.com/premiumsupport/knowledge-center/create-and-activate-aws-account/.
Once you receive an email indicating that your account is ready, follow these instructions to get API tokens needed for Cyclone ENTERPRISE deployment.
-
Open https://console.aws.amazon.com/
-
Select the Root User.
-
Enter the email address that you used for AWS registration. Click Next.
-
Enter the password. Click Sign In.
-
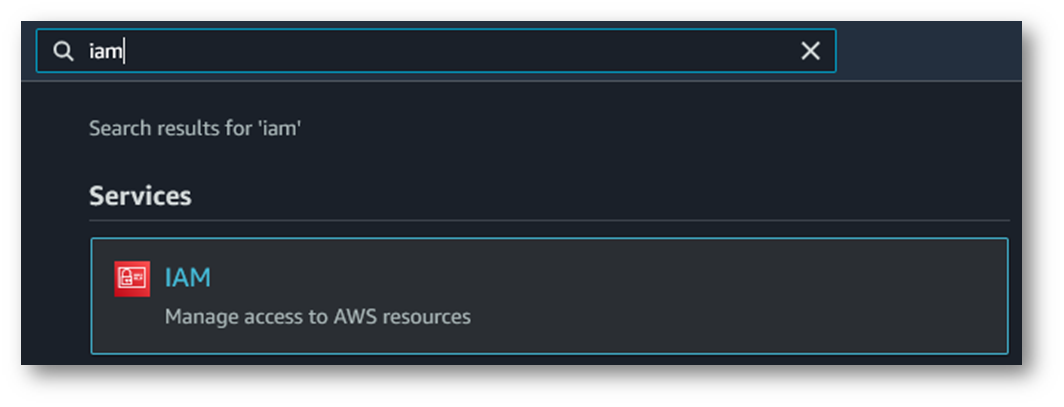
Enter “iam” in the search at the top of the page. You will immediately see the IAM entry under Services. Click IAM.
-
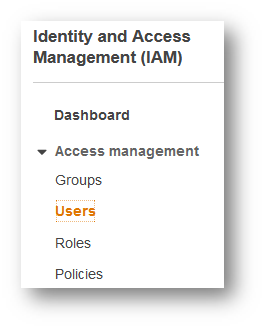
Select Users on the left panel.
-
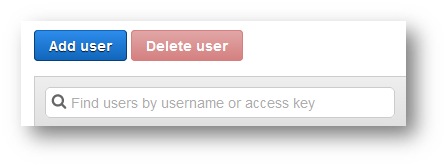
Click Add User.
-
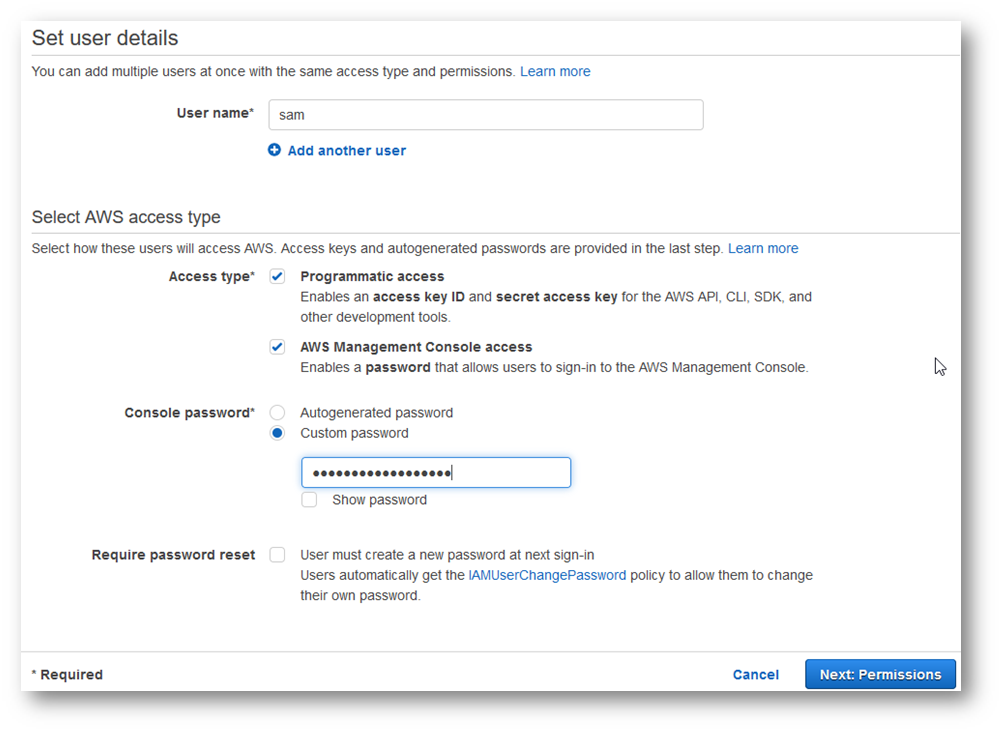
Enter your username.
-
Select both Programmatic access and AWS Management Console access.
-
Choose a Custom password and enter your password. Security best practice dictates that you should pick a new password that is different from that of your root username account.
-
Uncheck User must create a new password at next sign-in.
-
Click Next: Permissions.
-
Select Attach existing policies directly.

-
Per good security practices, users should be given the lowest level of permissions to get their job done. We suggest creating a new IAM user that has access to EC2 resources only. Enter "amazonec2fullaccess" in the search box.
-
Select AmazonEC2FullAccess entry in the Policy name table.
-
Click Next: Tags.
-
Click Next: Review.
-
Click Create User.
-
Click the Download .csv button. Keep the .csv file in a safe location. The file contains your Access key ID, Secret access key, and your Management Console access. 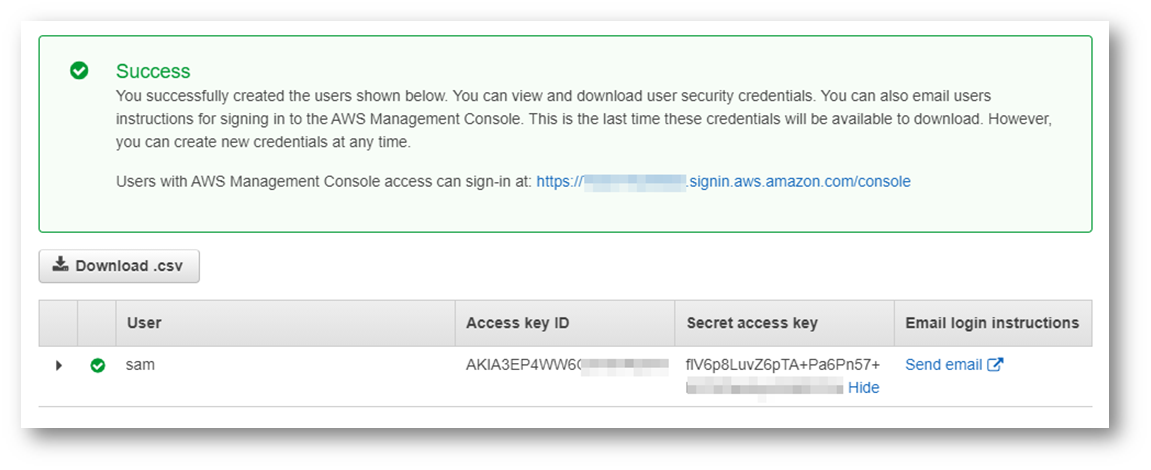
-
Access key ID and Secret access key are your API tokens. This is the only time AWS displays your API tokens. Make sure you write them down.
Note: Do NOT share the Access key ID and Secret access key with ANYBODY.
-
Save the URL for accessing AWS Management Console.
-
Click Close.
The AWS CLI tool is a command-line tool to manage your AWS services. The AWS CLI tool greatly simplifies AWS operations including EC2 instance deployment.
Note: The provided sample commands are not compatible with PowerShell unless noted.
-
Download the AWS CLI MSI installer for Windows: https://awscli.amazonaws.com/AWSCLIV2.msi
-
Run the MSI installer and follow the on-screen instructions.
-
To verify the installation, open the Command Prompt window and type "aws --version".

Note: Your version may vary, but this will ensure the CLI tools is correctly installed.
- Enter “aws configure” in the Command Prompt window.
- Enter the Access Key ID and Secret Access Key that you obtained earlier.
- Press Enter again to accept "None" for "Default output format".
Note: Refer to the AWS Region List table in the following section. Look up the Region ID (e.g., eu-west-2) of the city closest to you.
Note: Please check AWS resources for possible changes.
|
Region Name
|
Region ID
|
|
Virginia
|
us-east-1
|
|
Ohio
|
us-east-2
|
|
Oregon
|
us-west-2
|
|
N. California
|
us-west-1
|
|
Canada - Central
|
ca-central-1
|
|
Frankfurt
|
eu-central-1
|
|
Ireland
|
eu-west-1
|
|
London
|
eu-west-2
|
|
Milan
|
eu-south-1
|
|
Paris
|
eu-west-3
|
|
Hong Kong
|
ap-east-1
|
|
Mumbai
|
ap-south-1
|
|
Seoul
|
ap-northeast-2
|
|
Singapore
|
ap-southeast-1
|
|
Sydney
|
ap-southeast-2
|
|
Tokyo
|
ap-northeast-1
|
|
Bahrain
|
me-south-1
|
|
São Paulo
|
sa-east-1
|
|
Cape Town
|
af-south-1
|
|
Stockholm
|
eu-north-1
|
An AWS Security Group is a firewall for your EC2 instance to control inbound and outbound traffic.
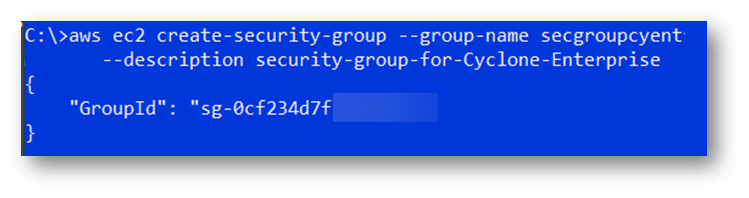
- Create a new security group named "secgroupcyent"
Note: Continuing in the command prompt, enter the following.
Note: It is highly recommended to copy and paste the the commands into a text editing program, e.g., Notepad ++, to review the code (e.g., remove empty lines) before entering in the command line.
Note: The placeholders in the code that are tagged by "<>" should be revised to match your information such as IP address, AMI ID, Instance ID, etc.
aws ec2 create-security-group --group-name secgroupcyent
--description security-group-for-Cyclone-Enterprise
-
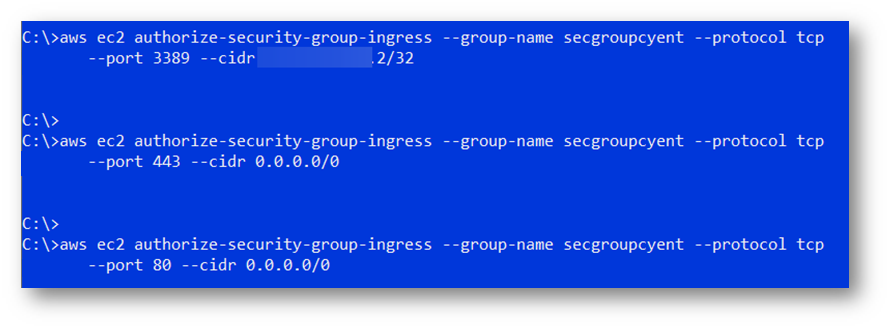
Create rules that control incoming traffic to your EC2 instance. By default, only three ports are open for inbound traffic: 3389 (remote desktop), 443 (https), and 80 (http).
Note: The placeholders in the code that are tagged by "<>" should be revised to match your information such as IP address, AMI ID, Instance ID, etc.
aws ec2 authorize-security-group-ingress --group-name secgroupcyent --protocol tcp --port 3389 --cidr <your IP address>/32
aws ec2 authorize-security-group-ingress --group-name secgroupcyent --protocol tcp --port 443 --cidr 0.0.0.0/0
aws ec2 authorize-security-group-ingress --group-name secgroupcyent --protocol tcp --port 80 --cidr 0.0.0.0/0
-
Optionally, create a rule that allows inbound traffic on Cyclone ENTERPRISE’s default port 5050.
aws ec2 authorize-security-group-ingress --group-name secgroupcyent --protocol tcp --port 5050 --cidr 0.0.0.0/0
Use the following command to find the latest Microsoft Windows Server 2019 with NVIDIA driver AMI ID for your region.
aws ec2 describe-images --filters "Name=name,Values=*windows-server-2019-vGaming*" --output json --query "sort_by(Images, &CreationDate)[-1].[ImageId]"
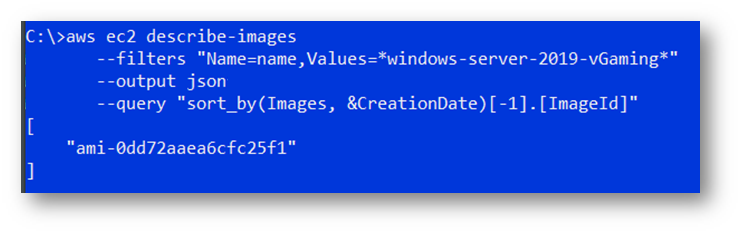
In the above example, the AMI ID is “ami-0dd72aaea6cfc25f1”.
Alternatively, you can locate the region in the table below that is closest to you and its AMI ID.
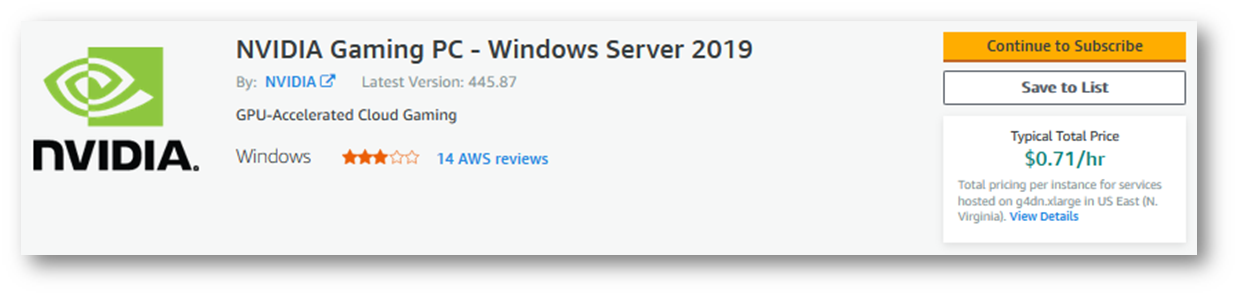
Note: Search online for “NVIDIA Gaming PC - Windows Server 2019”
Currently, some of the regional AMI IDs are as the followings (subject to change):
|
Region
|
AMI ID
|
|
Virginia
|
ami-0b66e8e7b0afc8be2
|
|
Ohio
|
ami-0147100c2f00ccbe9
|
|
Oregon
|
ami-04308b8ea71bf4d67
|
|
N. California
|
ami-0dd72aaea6cfc25f1
|
|
Canada - Central
|
ami-0be1644c5e0af3d05
|
|
Frankfurt
|
ami-0d1e1c5d07d06bcf3
|
|
Ireland
|
ami-0bdd2f8c63e3cd8c1
|
|
London
|
ami-097dc276efcc881f6
|
|
Paris
|
ami-0d541568461085683
|
|
Stockholm
|
ami-08315628a321d0f62
|
|
Singapore
|
ami-0186e18f594075934
|
|
Sydney
|
ami-07b464682a7ef0108
|
|
Tokyo
|
ami-0f8a3a1d1446b963d
|
|
Seoul
|
ami-093179249cbbb7d04
|
Note: NVIDIA regularly publishes new updated AMIs and so the list of AMI IDs will constantly change.
Create New Key Pair
A key pair is a set of credentials that you use to authenticate your identity to gain access to a computer. This step creates a key pair file called "cyent-key-pair" that you will use to access your EC2 instance. Ensure you keep the output file ‘cyent-key-pair.pem’ in a safe location.
aws ec2 create-key-pair --key-name cyent-key-pair --output text --query KeyMaterial > cyent-key-pair.pem
Note: DO NOT LOSE THIS FILE!
Create Storage Configuration File
Create a new text file named "blockdevice.json" with the following contents:
{
"DeviceName": "/dev/sda1",
"Ebs": {
"DeleteOnTermination": false,
"VolumeSize": 100,
"VolumeType": "gp2"
}
},
{
"DeviceName": "/dev/sda2",
"Ebs": {
"DeleteOnTermination": false,
"VolumeSize": 300,
"VolumeType": "gp2"
}
}
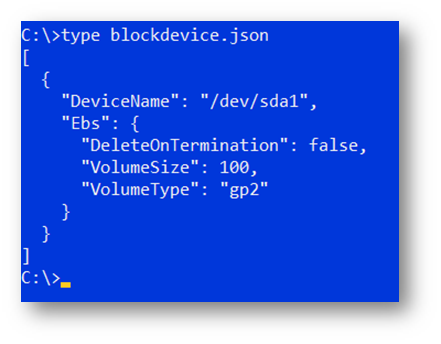
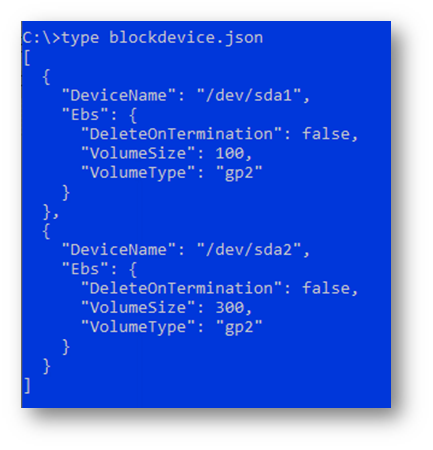
The above configuration creates a 100GB C drive (DeviceName: /dev/sda1) and 300GB D drive (DeviceName: /dev/sda2) for your EC2 instance. We recommend that you use the D drive as a data storage location. You can adjust the "VolumeSize" value (in GB) for /dev/sda2 to meet your data storage requirement.
Note: Please reference the section on Initialize Data Storage Disk in this document for details.
Note: A 3rd device will be also listed on the server. This device is called an EC2 instance storage volume, which accompanied with the GPU instance. The data on this device is only stored temporarily, and all the data will be deleted after restarting or shutting down the EC2.
For more information, please see the following links:
Cyclone ENTERPRISE requires a GPU-based instance such as ‘g4dn’ to function.
For best performance, we recommend ‘g4dn.2xlarge’ as the minimum instance type for the Cyclone ENTERPRISE server. EC2 pricing varies based on several factors including region, upfront payment amount, and duration.
Note: Refer to https://aws.amazon.com/ec2/pricing/reserved-instances/pricing/windows/#ris-nav for complete EC2 pricing information.
Launch a new EC2 instance using the AMI ID from a previous step.
Note: The placeholders in the code that are tagged by "<>" should be revised to match your information such as IP address, AMI ID, Instance ID, etc.
aws ec2 run-instances --instance-type g4dn.2xlarge --image-id <AMI ID> --key-name cyent-key-pair --block-device-mappings file://blockdevice.json --security-groups secgroupcyent

If you see this error, open the link shown in a browser.

Click Continue to Subscribe.
For security purposes, you may have to authenticate by logging into the AWS Management website again. Login using the credentials you used in the Create Your AWS Account section.
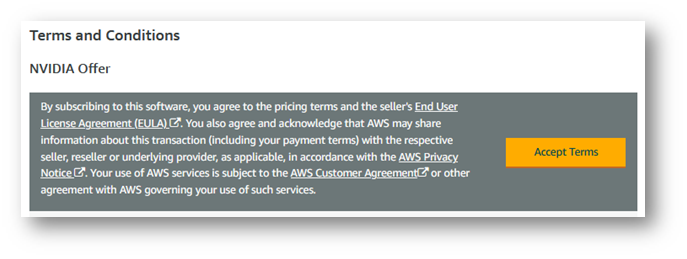
Click Accept Terms.
Wait a few moments. The following screen will appear. You can log out from the AWS Management website at this point.

Note: Verify that the Software/hr prices are all zero. The Windows Server 2019 with NVIDIA Driver AMI is provided at no cost. However, you are still responsible for AWS charges for all AWS resources used.
Repeat the EC2 launch command.
Note: The placeholders in the code that are tagged by "<>" should be revised to match your information such as IP address, AMI ID, Instance ID, etc.
aws ec2 run-instances --instance-type g4dn.2xlarge --image-id <AMI ID> --key-name cyent-key-pair --block-device-mappings file://blockdevice.json --security-groups secgroupcyent
A screen similar to the following will appear after a few moments. Note the “InstanceId” value (e.g., “i-0e51c56d597c3f5c6”).
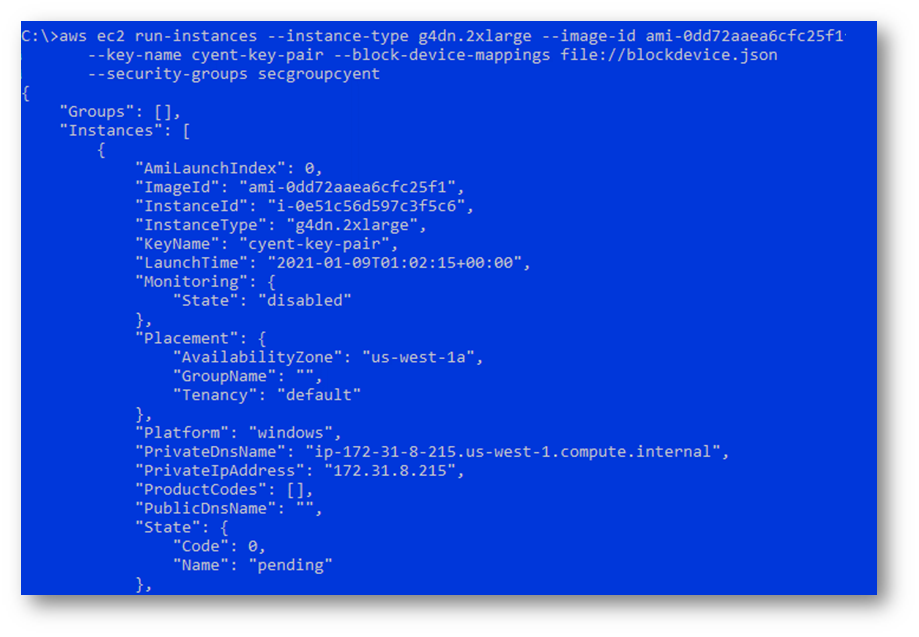
AWS is provisioning your EC2 instance at this time.
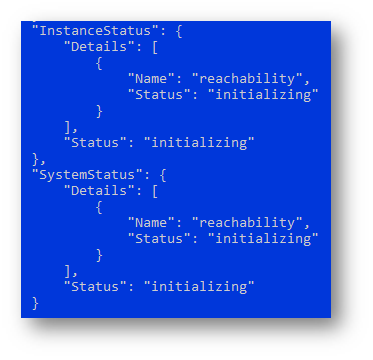
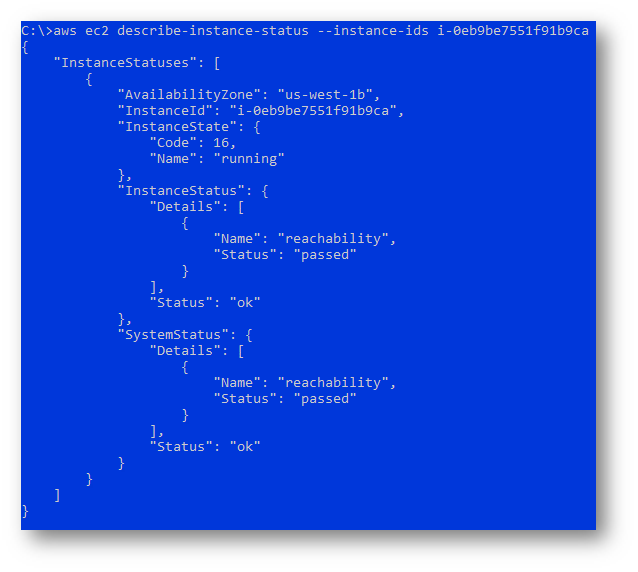
After a few minutes, run the following command to check the status of your EC2 instance.
Note: The placeholders in the code that are tagged by "<>" should be revised to match your information such as IP address, AMI ID, Instance ID, etc.
aws ec2 describe-instance-status --instance-ids <instance id
>

Verify that all Status values are “passed”. If either Status shows “initializing”, wait a few minutes and repeat the command until both Status show “passed”.
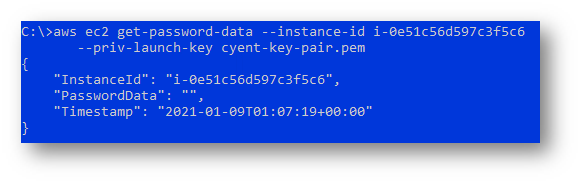
Locate the ‘cyent-key-pair.pem’ key file that you created in the Create New Key Pair section above. To retrieve your administrator password, you need to specify both your “InstanceId” and your key file.
Note: The placeholders in the code that are tagged by "<>" should be revised to match your information such as IP address, AMI ID, Instance ID, etc.
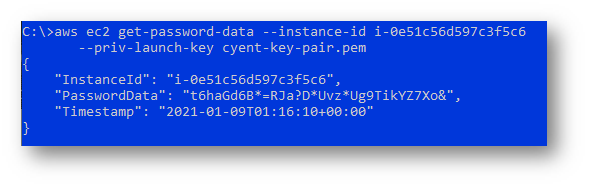
aws ec2 get-password-data --instance-id <InstanceId> --priv-launch-key <your cyent-key-pair.pem>
If PasswordData is empty (as shown below), AWS is still provisioning your EC2 instance. Wait 5-10 minutes and repeat the command.
Once EC2 provision is complete, the PasswordData string is the Windows’ administrator password for your EC2 instance.
Note: The placeholders in the code that are tagged by "<>" should be revised to match your information such as IP address, AMI ID, Instance ID, etc.
aws ec2 describe-instances --instance-ids <InstanceId> --query "Reservations[].Instances[].PublicIpAddress"
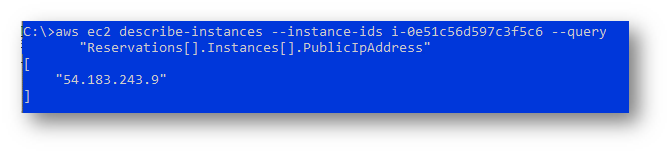
Note: In most cases, AWS will assign a new public IP address to your EC2 instance after rebooting.
Note: For instruction on how to get an Elastic IP, please see AWS documentation.
Once the administrator password and the public IP of the EC2 instance are set, you can access the instance
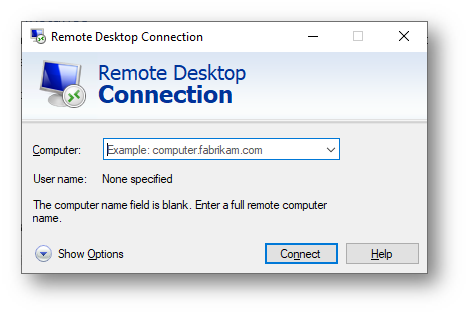
- Run the Remote Desktop Connection program.
- Click Show Options.
- Enter your EC2 instance’s IP in the Computer box.
- Enter <your EC2 instance’s IP>\Administrator in the User name box.
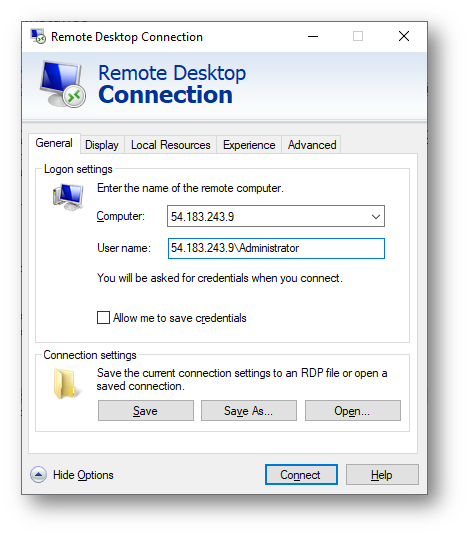
- Click Connect.
- Enter your password from the previous step.
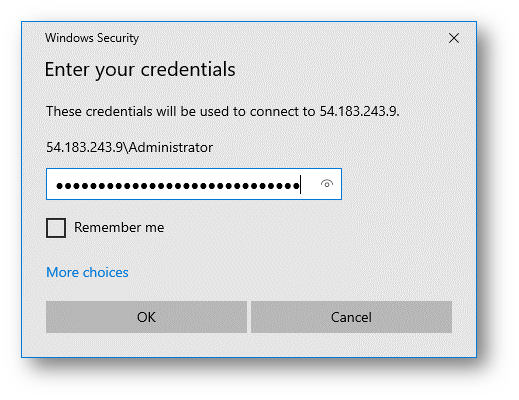
- Click OK.
- On the next dialog, select Don’t ask me again for connections to this computer. Click Yes.
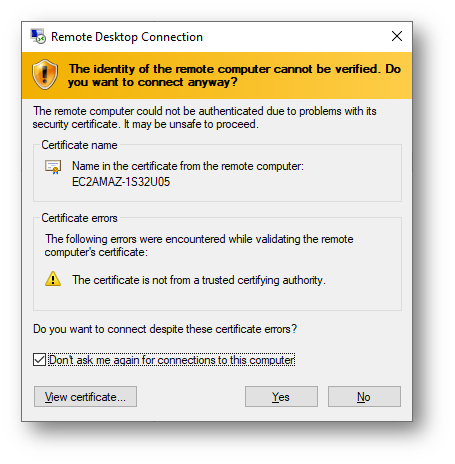
- The Remote Desktop window will open after a few seconds.
- Follow Cyclone ENTERPRISE installation instructions to install Cyclone ENTERPRISE on your EC2 instance.
Initialize Data Storage Disk
By default, AWS doesn’t automatically initialize a second storage drive (i.e., the 300GB D drive). Perform these steps to initialize the data drive:
- Connect to your EC2 instance using Remote Desktop Connection.
- Open PowerShell window (press the Windows key and type powershell). Select “Windows PowerShell” in the context menu.
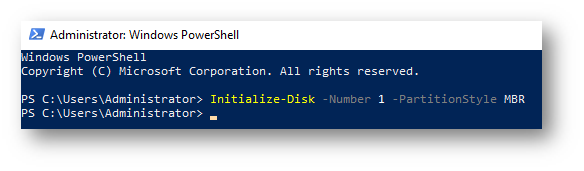
- Initialize the second disk.
Initialize
-Disk -Number 1 -PartitionStyle MBR
- Create a new partition on the second disk.
- Format the new partition.
In some cases, you may wish to stop your EC2 instance to reduce your AWS charges when you know the system will not be in use. To do so, please follow these steps:
-
Access your server via Remote Desktop Connection.
-
Click the Windows button.
-
Select Power.
-
Select Shut down.
-
Select Continue.
Note: Your EC2 instance will be stopped after a few minutes.
To restart your existing Cyclone ENTERPRISE EC2 instance:
- Open the command prompt window.
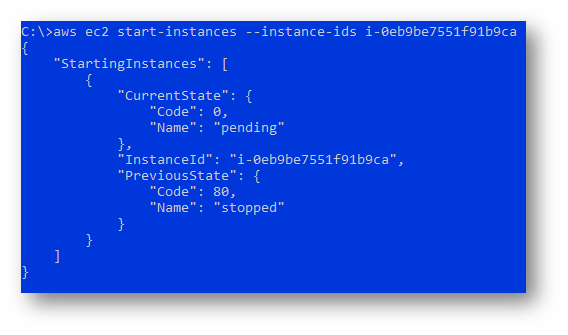
- Start your instance using the AWS CLI command. You will need your instance ID from the Launch Your EC2 Instance section.
Note: The placeholders in the code that are tagged by "<>" should be revised to match your information such as IP address, AMI ID, Instance ID, etc.
aws ec2 start-instances --instance-ids <instance id>
-
After a few minutes, run the following command to check the status of your EC2 instance.
Note: The placeholders in the code that are tagged by "<>" should be revised to match your information such as IP address, AMI ID, Instance ID, etc.
aws ec2 describe-instance-status --instance-ids <instance id>
- Verify that all Status values are “passed”. If either Status shows “initializing”, wait a few minutes and repeat the command until both Status’ show “passed”.
- In most cases, AWS will assign a new public IP address to your EC2 instance. Refer to the Get Public IP Address of EC2 Instance section for instructions to query an instance’s public IP address.
Note: You can use the same Windows administrator password to log on to your EC2 instance via Remote Desktop Connection.
Same as the regular installation in the Installing Leica CLM and Licensing Section.
Same as the regular installation in the Installing Leica Cyclone ENTERPRISE section.